
Why your board needs a Cheesie upgrade
A cheese board is only as good as the tools you use to serve it. The phrase "Cheesie gear" isn't just about branding; it refers to the specialized slicers, spreaders, and knives designed to handle the specific textures of different cheeses. Without the right equipment, even the finest artisanal wheels can become a mess of crumbled rinds and smeared paste.
The difference between a standard kitchen knife and a dedicated cheese tool is the geometry of the blade. A standard chef's knife compresses soft cheeses, forcing out creamy centers, while a wire slicer slices through hard, aged cheeses without crumbling them. Using the wrong tool doesn't just look messy; it alters the flavor profile by exposing the cheese to too much air and heat from your hands before it ever reaches the plate.
This roundup focuses on the specific gear that makes that "Cheesie" experience possible. We are skipping generic kitchenware to highlight tools that actually improve the serving experience. From wide-blade spreaders for soft Brie to sturdy wire graters for Parmesan, the right gear transforms a simple snack into a curated tasting event.
Top personalized cheese boards for hosting
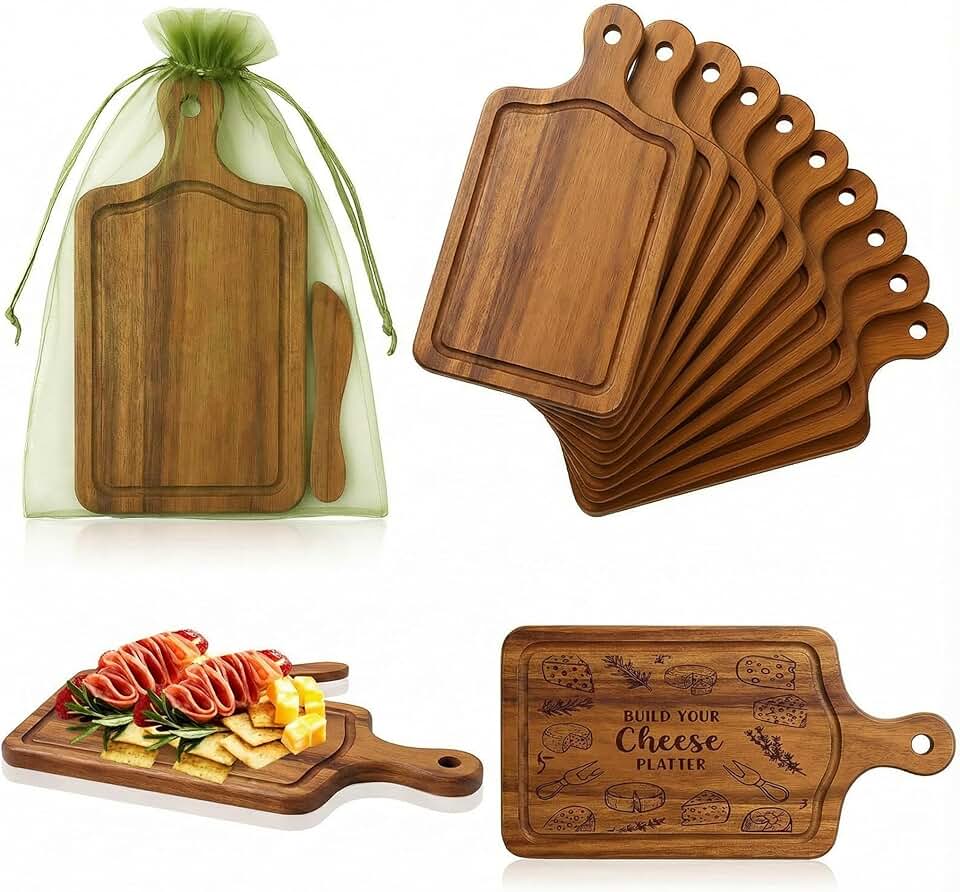
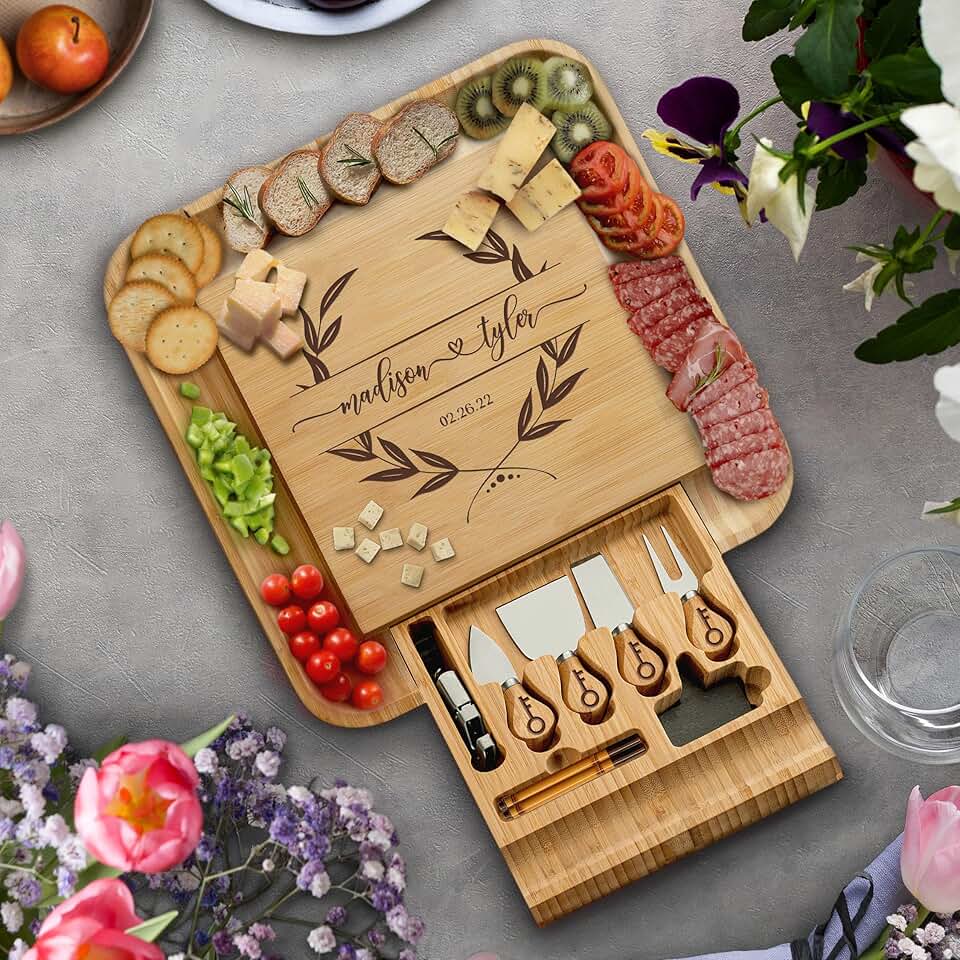
A personalized cheese board does more than display food; it sets the tone for the entire gathering. When guests arrive, the board is the first thing they see, and a custom design adds a layer of thoughtfulness that standard platters cannot match. Whether you are hosting a holiday party or a casual weeknight gathering, the right board turns simple cheese and crackers into a curated experience.
Choosing the right board depends on your hosting style and the types of cheeses you serve. Some boards feature carved compartments for separate dips, while others offer a smooth, expansive surface for arranging charcuterie in artistic patterns. Personalization options range from engraved names and dates to custom monograms, allowing you to match the board to the occasion or the recipient’s taste.
Below are some of the top-rated personalized cheese boards available on Amazon. These options have been selected for their durability, aesthetic appeal, and the quality of their engraving, ensuring they become a staple in your kitchen rather than a one-time novelty.


As an Amazon Associate, we may earn from qualifying purchases.
Best slicers for Taleggio and Romano
Cutting Taleggio and Pecorino Romano requires two completely different mechanical approaches. Taleggio is a soft, washed-rind cheese that clings to wire and smears under pressure. Romano is a hard, granular cheese that shatters if the blade isn't sharp and rigid. Using the wrong slicer turns a pleasant appetizer into a messy cleanup job.
The right tool matches the cheese's texture. A flexible wire slicer glides through sticky Taleggio without compressing the rind. A heavy-duty guillotine or a sharp, wide blade handles the crystalline structure of aged Romano with clean breaks.
We compared three distinct slicer types based on blade mechanics, material durability, and specific cheese suitability. The table below highlights the core differences to help you choose the right tool for your board.
| Slicer Type | Blade Type | Best For | Build Material |
|---|---|---|---|
| Flexible Wire Slicer | Stainless Steel Wire | Soft, sticky cheeses (Taleggio, Brie) | Plastic/ABS |
| Guillotine Cheese Cutter | Wide, Flat Blade | Hard, granular cheeses (Romano, Parmesan) | Stainless Steel |
| Rotating Disk Slicer | Rotating Steel Disk | Medium-hard cheeses (Cheddar, Gouda) | Stainless Steel/Plastic |
Flexible Wire Slicer for Taleggio
A flexible wire slicer is the only reliable way to cut Taleggio without destroying its shape. The thin wire exerts minimal pressure, allowing it to pass through the soft interior and sticky rind cleanly. This prevents the cheese from sticking to the blade or smearing onto your board.
Look for a model with a stable base and an adjustable height guide. This ensures even slices every time. The wire should be taut and rust-resistant to maintain hygiene and cutting performance.
Guillotine Cutter for Romano
Romano’s dry, crystalline texture demands a rigid, heavy blade. A guillotine-style cutter provides the necessary downward force to snap through the hard cheese without crumbling it into dust. The wide, flat blade supports the entire slice, keeping the presentation neat.
Choose a guillotine with a sharp, replaceable blade. Dull blades crush hard cheeses rather than cutting them, resulting in uneven shards. A non-slip base is essential for safety and stability when applying pressure.
Rotating Disk Slicer
While not ideal for the extremes of Taleggio or Romano, a rotating disk slicer offers a versatile middle ground. It works well for medium-hard cheeses often served alongside these two. The rotating disk provides a smooth, consistent cut with less effort than a manual blade.
This type is best if you want one tool for multiple cheese types. However, for dedicated Taleggio or Romano service, the specialized wire or guillotine options will yield superior results.
Essential graters and knives for Camembert
Camembert requires a different approach than hard cheeses. Its soft, creamy interior and bloomy rind demand tools that slice cleanly without crushing the wheel or mashing the paste into a mess. A standard block cheese grater will turn a delicate Camembert into a sticky, unappetizing pile. Instead, you need specialized knives and gentle graters designed for soft textures.
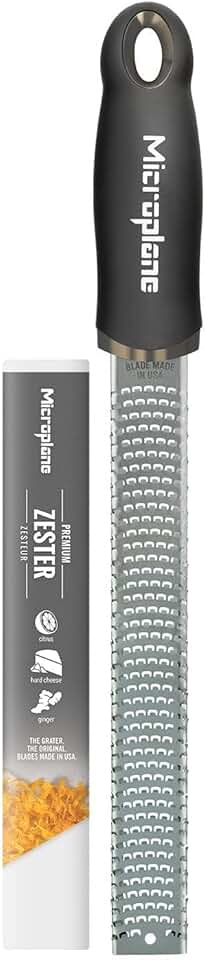
The most reliable tool for serving Camembert is a soft cheese knife with a flat, broad blade and often a small fork or spade at the tip. This design allows you to slide under the wheel, lift a generous wedge, and keep the rind intact. For grating, a microplane or a fine-holed grater works best if you want to sprinkle cheese over dishes, but for eating, slicing is superior.
Recommended Tools
Here are the essential items to complete your Cheesie kit for soft cheeses.


As an Amazon Associate, we may earn from qualifying purchases.
How to assemble your Cheesie board
Building a board that highlights your cheese slicers and personalized platters is less about artistic flair and more about logical zoning. The goal is to make every tool and every slice accessible without creating a cluttered mess. Treat your board like a small kitchen counter: distinct zones for cutting, serving, and eating.

Place your heaviest items first. A large wooden board or a slate platter acts as the foundation. If you are using a specialized cheese slicer, rest it on the edge of the board where it won’t roll off. Positioning your primary cutting tool at the top or bottom edge keeps the center clear for arranging the cheese.
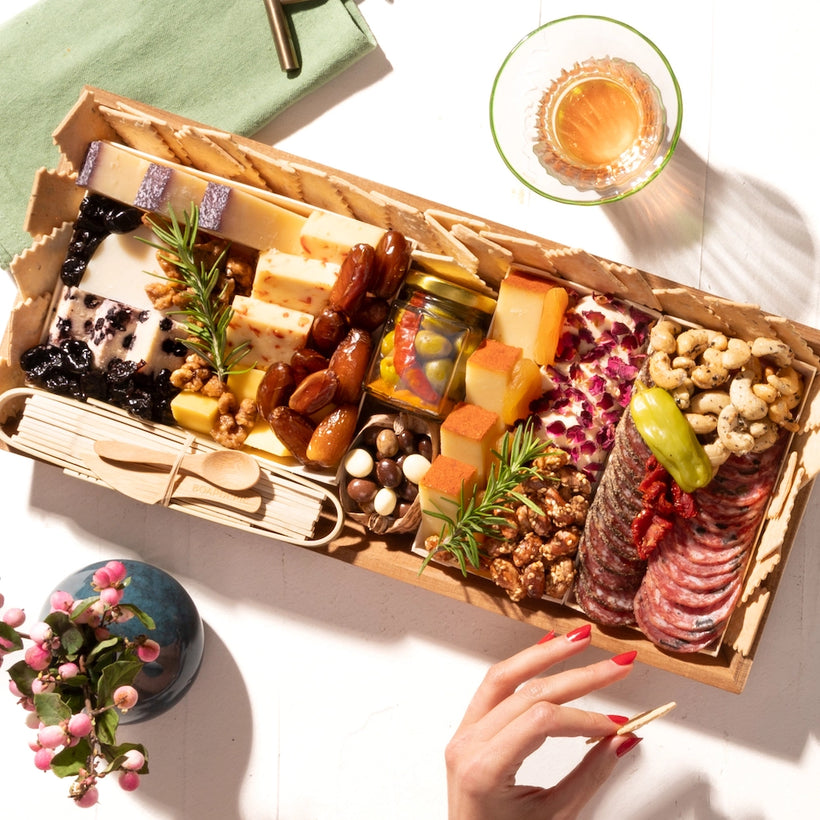
Don’t scatter your cheeses randomly. Pick two or three distinct types—perhaps a hard cheddar for slicing and a soft brie for spreading—and place them in a triangle formation. This creates visual balance and ensures you have enough variety to pair with your slicers. Leave space between them so guests don’t accidentally cross-contaminate flavors.

Now that your cheeses are anchored, fill the empty spaces with crackers and breads. Use rectangular crackers to line the edges, creating a border that frames the cheese. This is also the perfect spot to add your personalized cheese labels or small tags if you are serving at an event. The crackers should be easy to grab without disturbing the cheese arrangement.
Complete the board with small bowls of nuts, dried fruit, or a small dish of mustard. These items act as the "glue" that ties the flavors together. Place them in the remaining negative space, ensuring that every guest can reach at least one type of cheese and one type of cracker from any angle.
The key to a successful Cheesie board is simplicity. By keeping your slicers visible and your cheeses organized in distinct zones, you make the experience effortless for your guests. They can slice, serve, and enjoy without needing instructions or a map.
Common questions about cheese tools
We get asked a lot about the care and terminology of our favorite cheese gear. Here are the most frequent questions we hear from home hosts and cheese enthusiasts.
How do I clean my cheese knives?
Most of our recommended slicers feature stainless steel blades that resist rust and staining. To keep them in top shape, wash them by hand with warm, soapy water immediately after use. Avoid the dishwasher, as the harsh detergents and high heat can damage the handles and dull the fine edges over time. Dry them thoroughly before storing them in a block or sheath to prevent water spots and corrosion.
What is the difference between a cheese plane and a slicer?
A cheese plane is a handheld tool with a fixed blade, ideal for shaving thin curls from semi-hard cheeses like cheddar or gouda. It offers more tactile control and is perfect for delicate presentation. A cheese slicer, on the other hand, uses a wire or perforated blade to cut uniform slices with minimal effort. Slicers are better for larger wheels or when you need consistent thickness for stacking and serving.
Is "cheesier" or "more cheesy" correct?
Both terms are grammatically acceptable, though they serve different tones. "Cheesier" is the standard comparative form, often used to describe something that is more cheese-like or sentimental. "More cheesy" is also correct but can sound slightly more informal or emphatic. In the context of our gear, we prefer "cheesier" when describing the quality of the cut or the richness of the cheese experience.
No comments yet. Be the first to share your thoughts!